Friday, January 31, 2014

DIY Crayon Art

 
I wanted to share with you some of the colorful art I've made for the kids bedrooms. These two are my favorite.  They are very easy to make and inexpensive!
 
CRAYON ART

WHAT YOU'LL NEED:
A couple boxes of crayons
foam board (its only $1 at Dollar Tree)
hot glue gun
hairdryer
 
1. Take the crayon paper off all of the crayons. 
2. Hot glue the crayons in whatever shape/pattern you want on the foam board.
I laid them all out first before gluing them down to make sure that's where I wanted the crayons.  Then take it OUTSIDE!  You DO NOT want to do this next part indoors. 
3. You'll have to figure out what angle you want your hairdryer, but aim the hairdryer starting out on low heat at the crayons.  The crayons will melt slowly, and run in the direction you are pointing the hairdryer.  That's it!
4. I also hung the crayon art on the wall using Velcro Damage-free hanging strips. 
 
Happy crafting/melting! :)

Wednesday, January 29, 2014

These are a few of my favorite...apps!

I have made a  list of my all time favorite apps for the iphone/ipad...it was reeeeeeally long!!  So, I tried to shorten my list to my top 5 apps...I couldn't do it!  I didn't realize that I have THAT many favorites for my speech kiddos and my own little munchkins!  So..I've decided to ONLY tell you about one of my favorite apps that I've been using a lot this week...for now. I'll share more later. There's just too many apps and too little time...

Lazoo: Let's Color! *FREE*  (there is also Lazoo Zoo, Lazoo: Squiggles!, Lazoo: Miku's Picnic - ALL ALSO FREE).  Lazoo's Magic Stickers: $1.99  But for now, I'm just going to tell you about Lazoo: Let's Color!  The others are also AWESOME.  Please check them out if you're interested.
My kids and patients love this app.  There are 34 unique drawing pages.  It promotes creative thinking.  You can draw on the screen, and your drawings come to life when you press "go".  It also includes a Lazoo cartoon.  It's great for following directions, problem solving, creativity, talking about actions, answering WH questions, pronouns, vocab, articulation, expressive/receptive language...so..many..things!
Above shows a child holding a hose.  It asks: "what is coming out of the hose?" And you can draw whatever you want to come out of the hose.  You can choose colors, how you wish to paint (chalk, paintbrush, marker etc.) You can also add stickers, as shown below.  You then press "go", and the picture will "come to life".  ENJOY!!
 

Monday, January 27, 2014

DIY Weighted Sensory Blanket

I recently made a sensory blanket for my 7 year old daughter (Keira) who struggles with some sensory and focusing issues.  I can also use it with my speech kiddos that need this sensory input. 

DIY weighted sensory blanket.  I wanted to share it with you guys because it can be an inexpensive way to give your kiddos some much needed sensory input.  When Keira is working on homework/work at school, she will lay it on her lap to give her that sensory input she craves. Besides her oral sensory issues, she also struggles to keep her feet still/taps her toes under the table until the toes of her shoes are torn up/stands up a lot in class when she's supposed to be working/plays with her hair a lot...Oh and in the last year, she has made it very clear that she hates wearing jeans.  She loves to wear leggings or any other pants that fit perfectly against her legs instead or else she throws a "7 going on 17" tantrum.  Brushing her teeth is also a struggle.  She does not want to wet her toothbrush when brushing her teeth.  She would rather brush her teeth with a dry toothbrush and gets "grossed out" when she watches her 5 year old sister brush her teeth correctly.  I could go on about other things, but I won't.  God love her...we are trying our best to help her and so most days she wears leggings, chews gum in school to help with the oral sensory issues, and is on a low dose of Adderall for her recently diagnosed ADHD.  It's helping.  We didn't wan to give her meds initially, but it's working for now until she can do well in school and be able to focus without it.  Let's just say..her teacher knows when we forget to give her the meds.  She is a well behaved child...it's not to correct behavior.  We give it to her so she can focus only while at school Monday-Friday.  Whew! Anyway...so this turned into a story about Keira instead of a post about how to create a sensory blanket.  So here ya go!  :)


The proper weight should be 10% of body weight, plus 1lb.  Oral children may chew on the blanket, which could be dangerous for the child, so you must decide if this is a good option for your child. 

Here's what you'll need:
a bag of pinto beans or rice (I used pinto beans, but the pics I attached are one that was made w/rice)
duck tape (I used a pretty design so it would be "kid approved")
zip lock bags

Step 1: measure out your filling.  I used 1 cup of pinto beans in each bag (rice is pictured below)

Step 2: lay everything out to make construction easier (I used 9 bags so it was a 3x3 formation)

Step 3: Fold over top of ziplock bag, press down on top strip of tape then space bags across to create the first row.

Step 4: Affix the bottom of the bags to the next strip of tape.

Step 5: Repeat steps 3 and 4 until you have the desired number of rows, then place a final strip of tape along the bottom of the last row.

Step 6: Cover the rows of duck tape to seal the seams. 
Step 7: Finish the border with vertical strips.
Step 8: use long strips of tape to cover the bags.
 
 
Step 9: Flip blanket over and repeat step 8 until completely covered.


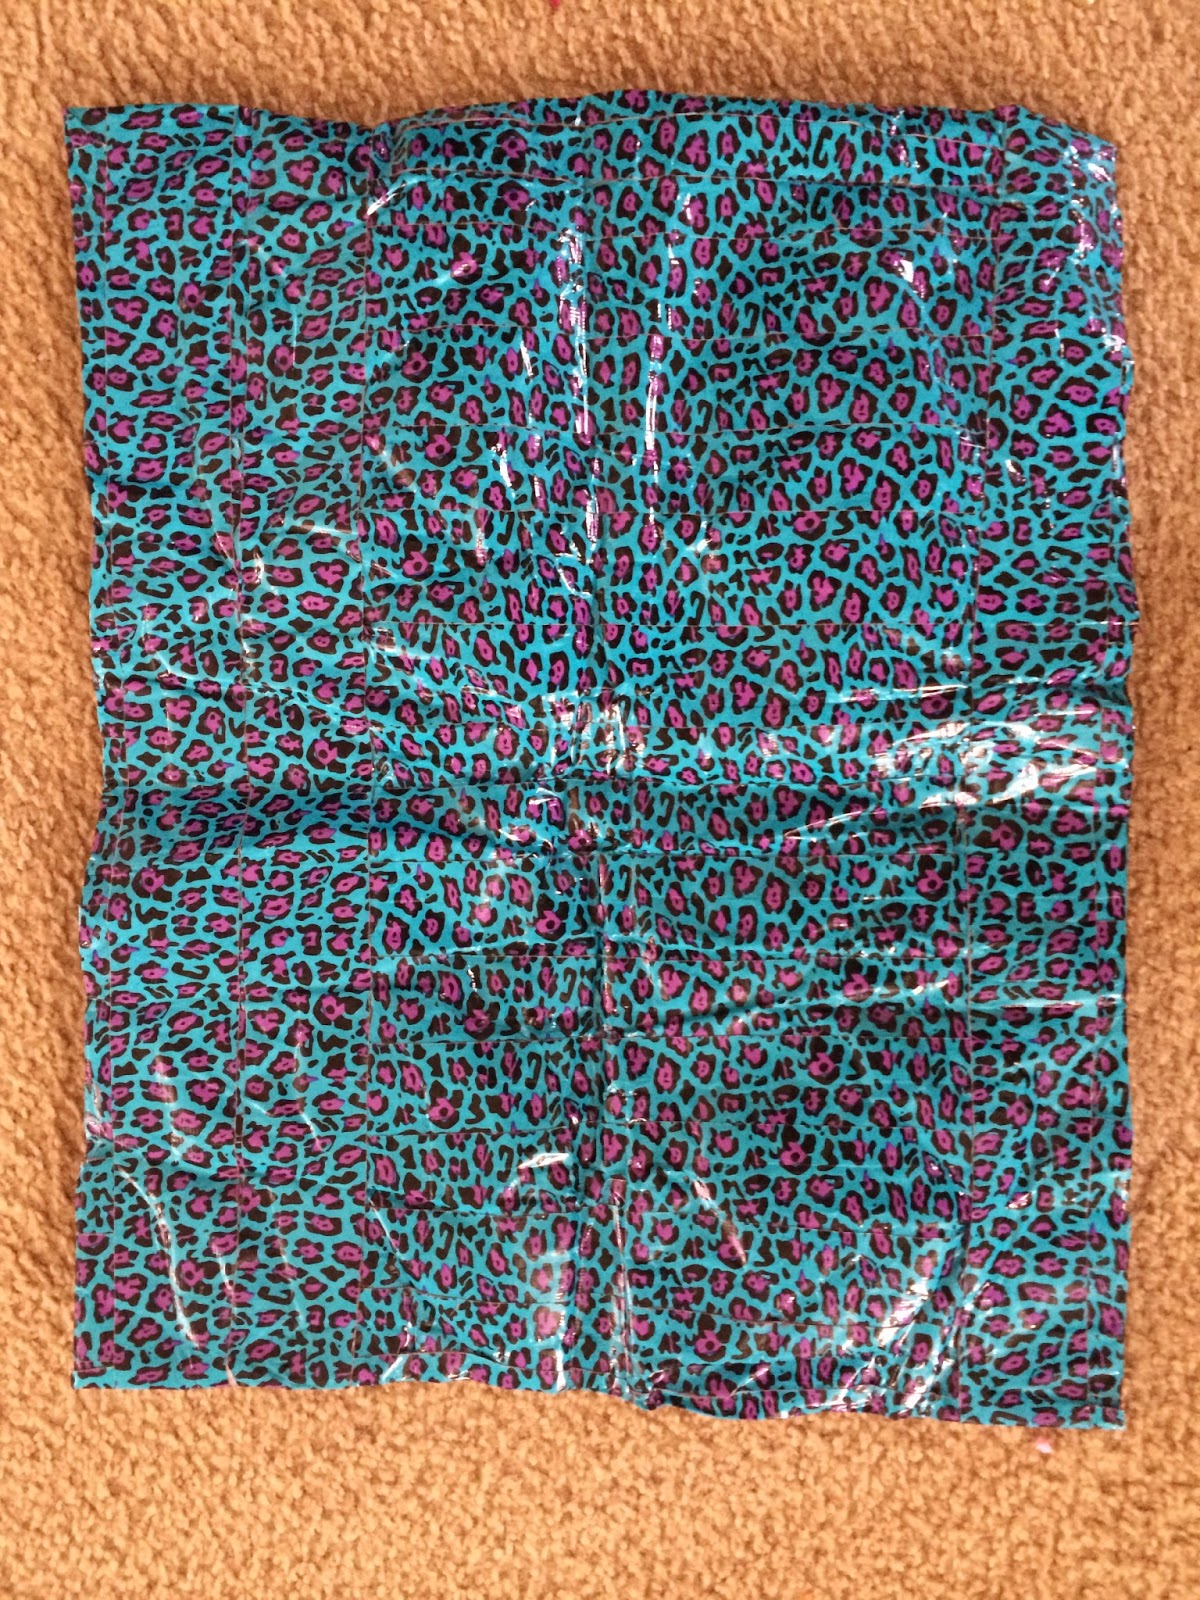
Step 10: Fold tape over each side to seal and smooth out the edges, and your weighted blanket or lap pad is done!  This one below is different from the one I made (different color duck tape, and I used pinto beans instead of rice).   I think mine is prettier, and it's Keira and patient approved. ;)

Saturday, January 25, 2014

Glitter Timer

So...I was going to wait until tomorrow...or another day to write this post. Buuuuut, I figured I would at least show you guys one of my favorite things I've made.  I kind of love Pinterest.  So..here it is! 
Glitter Timers!
You can use this for your children/patients in order to focus on an activity for a few minutes (depending on how much glue you put inside your bottle).  You can use it for a "time out/relax time".  You can use it as a timer when your kids take a bath, brush their teeth, clean their room..etc.
I found this months ago on Pinterest (I love Pinterest..but I'm pretty sure I've only created about 2% of what I've actually ever pinned).  I have three kids and a job..don't judge me. LOL  Anyway, I love this timer because young children don't understand the concept of time or clocks. So...this is a great visual for them!  I use it at home with my own children, and with my patients that struggle with transitioning between activities and ending each session. 
Here's what you'll need!
1. A large empty water bottle (the large flavored water bottles or Smart Water bottles work great). I made a couple timers inside mason jars, but quickly realized that glass jars and speech kiddos that enjoy throwing things don't mix.  Also, just peel off the label. :)
2. glitter glue
3. clear tacky glue
4. glitter
5. hot water


Steps to create this craft:
1. pour hot water in water bottle about 3/4 full.
2. Squeeze the entire bottle of glitter glue in.
3. Pour in the amount of glitter you would like to see fall.
4. Begin squeezing in a little bit of tacky glue at a time in order to test the timer (more tacky glue=the longer your timer will be). Add more tacky glue in order to get your desired "minutes". :) But hurry, because the hot water helps melt the glue.  If you let the hot water cool off, the glue will clump.
Happy Crafting!


My First Blog!

Hi everyone!  I've been thinking about starting a blog for a while now, basically so I can share speechie crafts/activity ideas with everyone (and be able to organize them for myself!)  Every year, I try to remember what craft or activity I did with certain patients, especially when the holidays roll around.  I can never seem to remember!  So, this blog is also to help me keep track of all my craft/activity ideas throughout the years. 
I used to have a blog a few years ago, but mostly to record what hilarious things my children said.  Well, they say something pretty entertaining on a daily basis so it got pretty difficult remembering to write them all down to add them to the blog. 
I've decided that this blog will be not only for my crafts/activity ideas, but to also share some of my favorite speech crafts/ideas from other bloggers that I follow to give them a shout out (and more followers), to share what's going on in my family's life (and the many, many pictures I take of my 3 girls), fun places to go with your kids/sales I find every week, recipes I love, and awesome Ipad apps I use with my kiddos. 

So, as a way to introduce myself, and let you get to know me...here is what I've been up to this week with my family with pictures..in random order.

Taylor swinging at O.P Schnabel Park
Taylor pretending to drive a car, she says.
These are my very silly girls (that take after their mother).

It was very cold (for Texas), and I changed into my adult onesie when I got home from work.
Keira and Cadence playing with new friends on the playground.


French braid pig tails to work today.


Decided to detox with my husband for 2 days (was supposed to be 3). This one tastes much better than the green one.

playing at O.P. Schnabel Park

I want to detox...but the green one scares me.

DQ run in our jammies!

My two older girlies at O.P. Schnabel Park

Decided to clean out the spice cabinet and actually use our spice rack.  And..I found this. haha!

What happens when my oldest gets ahold of my iphone.

I turn around for 10 minutes to help Keira with her school project, and Cadence takes all these movies down..sigh.

And this is my husband, Kevin! Lovin' on our youngest, Taylor.

Taylor will be the next Olympic gymnast.

another pic of our silly girls...and Taylor happened to fall at that exact moment. lol She was fine, promise!

Cadence swinging at the park

I almost couldn't take this picture because I was laughing so hard, I was shaking! lol